Vinyl shirt placement is a popular method for creating custom designs. It offers a creative way to personalize apparel with unique, vibrant designs. Proper placement ensures a professional finish, and printable guides can help achieve precise results.
1.1 What is Vinyl Shirt Placement?
Vinyl shirt placement is a technique used to apply custom designs or graphics onto apparel using vinyl material. It involves cutting designs into vinyl sheets and transferring them onto shirts using heat and pressure. This method is popular for creating personalized clothing, as it allows for vibrant, durable, and intricate designs. Printable guides are often used to ensure accurate placement, helping creators achieve professional-looking results. Vinyl placement is versatile, suitable for various shirt styles, and is widely used in DIY projects and small businesses.
1.2 Importance of Proper Vinyl Placement
Proper vinyl placement is crucial for achieving a professional and visually appealing finish. Misaligned designs can make a shirt look amateurish and detract from the overall aesthetic. Accurate placement ensures the design is centered, symmetrical, and proportional to the shirt. This attention to detail enhances the durability of the vinyl, as improper alignment can lead to peeling or uneven wear. Using printable guides or rulers helps maintain consistency, especially for DIY projects or small businesses aiming for a polished look. Proper placement also reflects the creator’s professionalism, making the final product more attractive to customers.

Understanding the Basics of Vinyl Placement
Understanding vinyl placement basics is key for beginners. Essential tools include rulers, guides, and alignment aids. Standard practices ensure designs are centered and properly aligned for a polished look.
2.1 Materials Needed for Vinyl Placement
To get started with vinyl shirt placement, you’ll need a few essential materials. A high-quality vinyl cutter or pre-cut vinyl designs are fundamental. A heat press is required for applying the vinyl onto the fabric. Additional tools include a printable placement guide, rulers, and alignment aids like grid paper or a laser alignment tool. Transfer tape is necessary for smoothly placing the vinyl onto the shirt. A weeding tool helps remove excess vinyl, and a lint roller keeps the shirt surface clean. Optional items like a cutting mat and squeegee can enhance precision and ease.
2.2 Standard Locations for Vinyl on T-Shirts
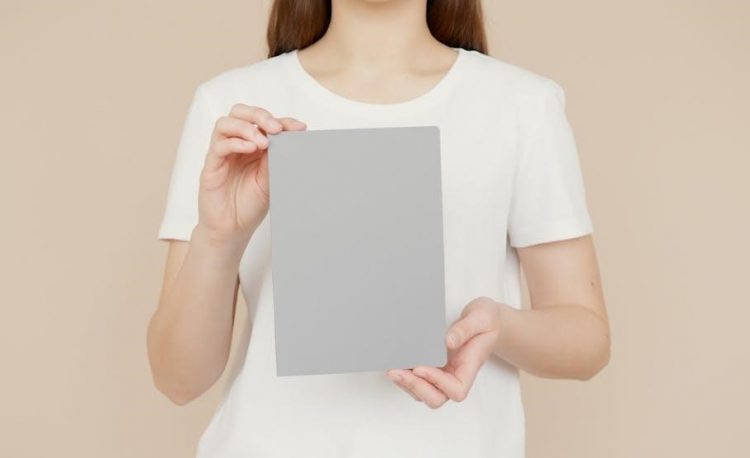
The most common locations for vinyl on T-shirts include the chest, back, sleeves, and neck. The chest area is ideal for small logos or designs, while the back is perfect for larger, full-design prints. Sleeves are great for subtle accents or brand names. The neck area, particularly above the collar, is another popular spot for small logos. Proper alignment is key, with designs often centered for a professional look. Printable guides can help ensure accurate placement, especially for symmetrical designs on the chest or back. Always consider the design size relative to the shirt for the best visual appeal.

Measuring and Aligning Your Design
Measuring and aligning your vinyl design ensures proper placement. Fold the shirt in half to find the center, then use a printable guide or ruler for precise alignment.
3.1 How to Find the Center of a T-Shirt
Finding the center of a T-shirt is crucial for balanced vinyl placement. Fold the shirt in half lengthwise, then fold it again to locate the midpoint. Pinch the center point and unfold to see the crease. This method ensures symmetry. For precise alignment, use a ruler or printable guide to measure from the collar and sleeves. Ironing the folded shirt can create a visible crease, marking the center. This step is essential for professional-looking designs, ensuring your vinyl is perfectly centered every time. Proper alignment enhances the visual appeal of your custom shirts.
3.2 Tools for Accurate Vinyl Alignment
Accurate vinyl alignment is made easier with the right tools. A T-shirt ruler guide, like the one from JenniferMaker.com, provides precise measurements for placement. Heat press alignment tools, such as a laser guide, help center designs. Folding the shirt to find the center and using a printable guide ensures symmetry. Iron-on transfers with grid paper can also aid in aligning intricate designs. These tools prevent misalignment and save time, ensuring professional results. Investing in a high-quality heat press with built-in alignment features further enhances precision. Proper tools are essential for achieving flawless vinyl placement every time.

Using a Printable Vinyl Placement Guide
A printable vinyl placement guide simplifies the process, offering precise alignment and consistent results. It helps creators avoid errors and achieve professional-looking designs effortlessly, saving time and enhancing creativity.
4.1 How to Create a Printable Guide
To create a printable vinyl placement guide, start by measuring your design and shirt dimensions. Use a ruler to mark the center point on the shirt by folding it in half vertically and horizontally. Transfer these measurements to a template or graph paper, ensuring alignment marks are clear. You can also use a heat press guide tool for accuracy. Finally, print the guide on sturdy paper or cardstock and place it under the shirt during application to ensure precise vinyl alignment. This method guarantees professional results for custom designs.
4.2 Common Sizes for Vinyl Placement Templates
Common sizes for vinyl placement templates include 8.5×11 inches for standard designs and 11×17 inches for larger prints. Mini guides are ideal for small designs, while adjustable templates accommodate various shirt sizes; These templates are typically printed on sturdy paper or cardstock for durability. They often feature grid lines, center marks, and alignment guides to ensure precise placement. Using standardized sizes ensures consistency across projects and makes the application process efficient. Printable guides are widely available online or can be custom-made to fit specific needs, making them a versatile tool for crafters and professionals alike.
Heat Press Setup for Vinyl Placement
Proper heat press setup is crucial for vinyl application. Ensure the temperature is set between 280-320°F, with medium to high pressure. Preheat the press for optimal results.
5.1 Recommended Temperature and Pressure Settings
For optimal vinyl placement, set your heat press to 280-320°F, depending on the vinyl type. Use medium to high pressure to ensure proper adhesion. Preheat the press for 5-10 minutes before use. Adjust settings based on fabric thickness and vinyl thickness. Lower temperatures are best for delicate materials, while higher settings suit thicker fabrics. Ensure even pressure distribution to avoid air bubbles or uneven application. Always refer to the vinyl manufacturer’s guidelines for specific temperature and pressure recommendations. Proper calibration ensures a durable, long-lasting design on your custom shirts.
5.2 Preparing Your Heat Press for Vinyl Application
Preheating your heat press is essential for even temperature distribution. Set the press to the recommended temperature and let it warm up for 10 minutes. Ensure the platen is clean and dry. Use a printable vinyl placement guide or ruler to align your design accurately. Smooth wrinkles on the shirt and remove moisture by lightly ironing. Place the shirt on the press, position the vinyl, and secure it with heat-resistant tape. Double-check alignment before closing the press. A well-prepared setup ensures a flawless vinyl application and professional-looking results for your custom shirts.

Troubleshooting Common Mistakes
Common errors include misaligned designs, uneven heat application, and incorrect pressure settings. Adjusting placement guides and ensuring proper heat press calibration can resolve these issues effectively.
6.1 Fixing Misaligned Vinyl Designs
Misaligned vinyl designs can ruin a custom shirt. To fix this, ensure your design is centered by folding the shirt in half or using a printable guide. Measure twice before cutting and pressing. Use a ruler or alignment tool to double-check placement. If the design is slightly off, carefully peel and reposition it. For severe misalignment, start over with a new vinyl sheet. Always test placement on a spare shirt first to avoid wasting materials. Proper alignment ensures a professional finish and saves time in the long run.
6.2 Avoiding Errors in Vinyl Placement
To avoid errors in vinyl placement, always use a printable guide or ruler to ensure accuracy. Fold the shirt in half to find the center and mark it clearly. Measure the design against the shirt to confirm size and alignment. Double-check the placement before pressing, as vinyl cannot be repositioned once applied. Use a heat press guide to maintain consistent pressure and temperature. Test your design on a spare shirt first to ensure proper alignment and adhesion. Proper preparation and careful alignment will help you achieve professional-looking results every time.

Popular Design Trends for Vinyl Shirts
Vinyl shirts are popular for trendy designs like minimalistic logos, retro graphics, and humorous quotes. Custom designs with vibrant colors and unique patterns are also in high demand.
7.1 Current Trends in Vinyl Shirt Designs
Current trends in vinyl shirt designs emphasize personalization and creativity. Popular styles include bold graphics, minimalist logos, and humorous quotes. Vibrant colors and unique patterns are also in demand. Many designers are incorporating custom names, motivational phrases, and retro-inspired artwork. Additionally, there is a rise in combining vinyl with other techniques like sublimation for multi-colored designs. Distressed prints and vintage-style text are also gaining traction, offering a classic look. These trends allow individuals to express their personality and align with current fashion aesthetics, making vinyl shirts a versatile and fashionable choice for personal and promotional use.
7.2 Customizing Shirts with Unique Vinyl Designs
Customizing shirts with unique vinyl designs allows for endless creativity and personalization. Using printable guides ensures precise placement, making it easier to achieve professional-looking results. From bold logos to intricate patterns, vinyl designs can be tailored to fit any style or theme. Many creators opt for custom names, quotes, or artwork that reflects individuality. Combining vinyl with other techniques, like heat transfer vinyl (HTV), adds depth and texture. Symmetry and alignment tools are key to creating visually appealing designs. With the right tools and a bit of creativity, anyone can craft unique vinyl shirts that stand out and make a statement.
Vinyl shirt placement is a fun and creative process. With proper guides and tools, achieving professional results is easy. Explore more resources to refine your skills.
8.1 Summary of Key Takeaways
Proper vinyl placement is essential for achieving professional-looking designs on shirts. Using printable guides ensures accuracy and consistency. Measure carefully, align designs centrally, and use tools like rulers or heat press guides for precision. Practice makes perfect, so don’t be discouraged by initial mistakes. Always pre-heat your press and follow temperature guidelines for the best results. Explore design trends and experiment with unique ideas to create standout custom shirts. With patience and the right tools, you can master vinyl shirt placement and produce high-quality, personalized apparel.
8.2 Resources for Further Learning
For mastering vinyl shirt placement, explore resources like JenniferMaker’s free T-shirt ruler guides and YouTube tutorials offering step-by-step instructions. Printable guides and heat press setup checklists are also available online. Communities like Facebook groups and forums share tips and troubleshooting advice; Additionally, consider courses on platforms like Udemy or Skillshare for in-depth training. Websites specializing in craft supplies often provide detailed placement charts and design templates. Utilize these tools to refine your skills and stay updated on the latest trends in vinyl shirt customization.